01/03/2014
quick look :: country chic

^ awesome photo by callaway gable
doing some quick looks at some of my favorite designs and new items…
another one of my absolute favorite designs was originally designed for deanna pappas and stephen stagliano’s country chic wedding. since then, i’ve done versions of this invite for other brides, customizing with their colors. i even did one on wood paper in place of real wood to stay on budget. so many options!
the original (above) was in gorgeous fall colors of burnt orange, copper and chocolate…it’s screenprinted on real wood, wrapped with silk dupioni ribbon and finished with intertwined wood horseshoes.
here are a few that i’ve done in varying colors…it’s so fun how just the ribbon color can change the feel of the design! (excuse the behind the scenes iphone snaps!)


^ chocolate, champagne and bronze
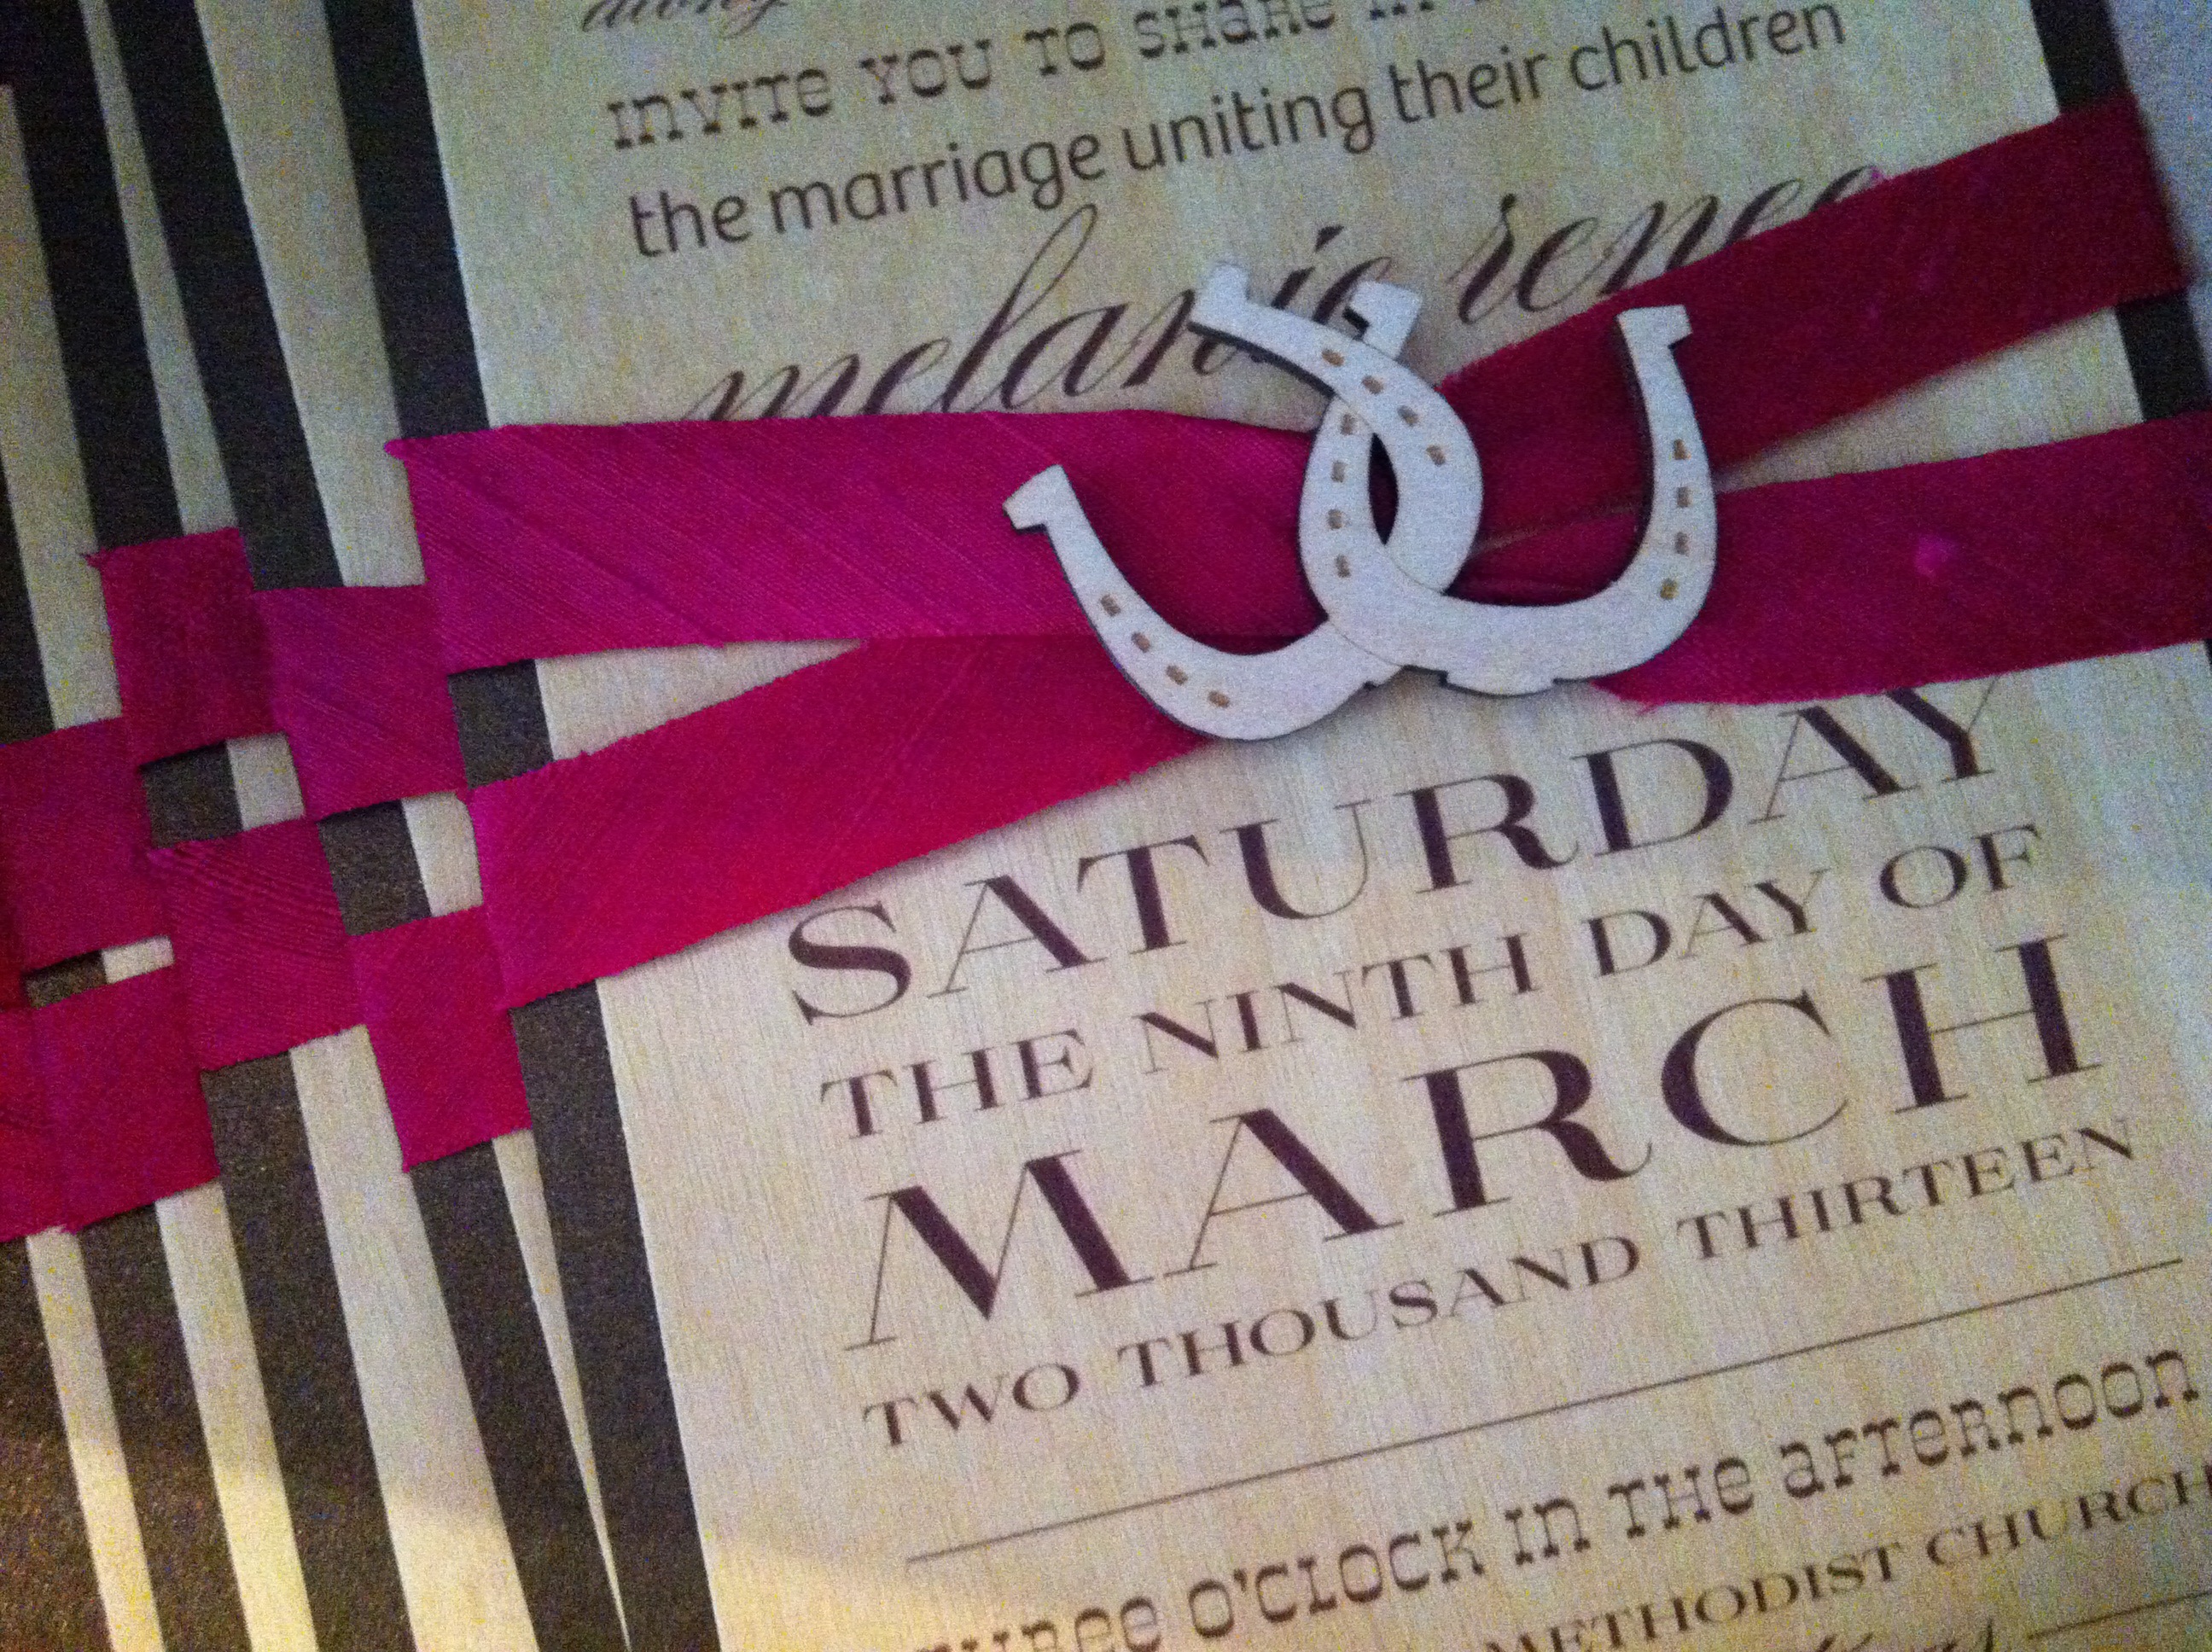
^ fuchsia, bronze and chocolate (on wood paper with bronze backing)


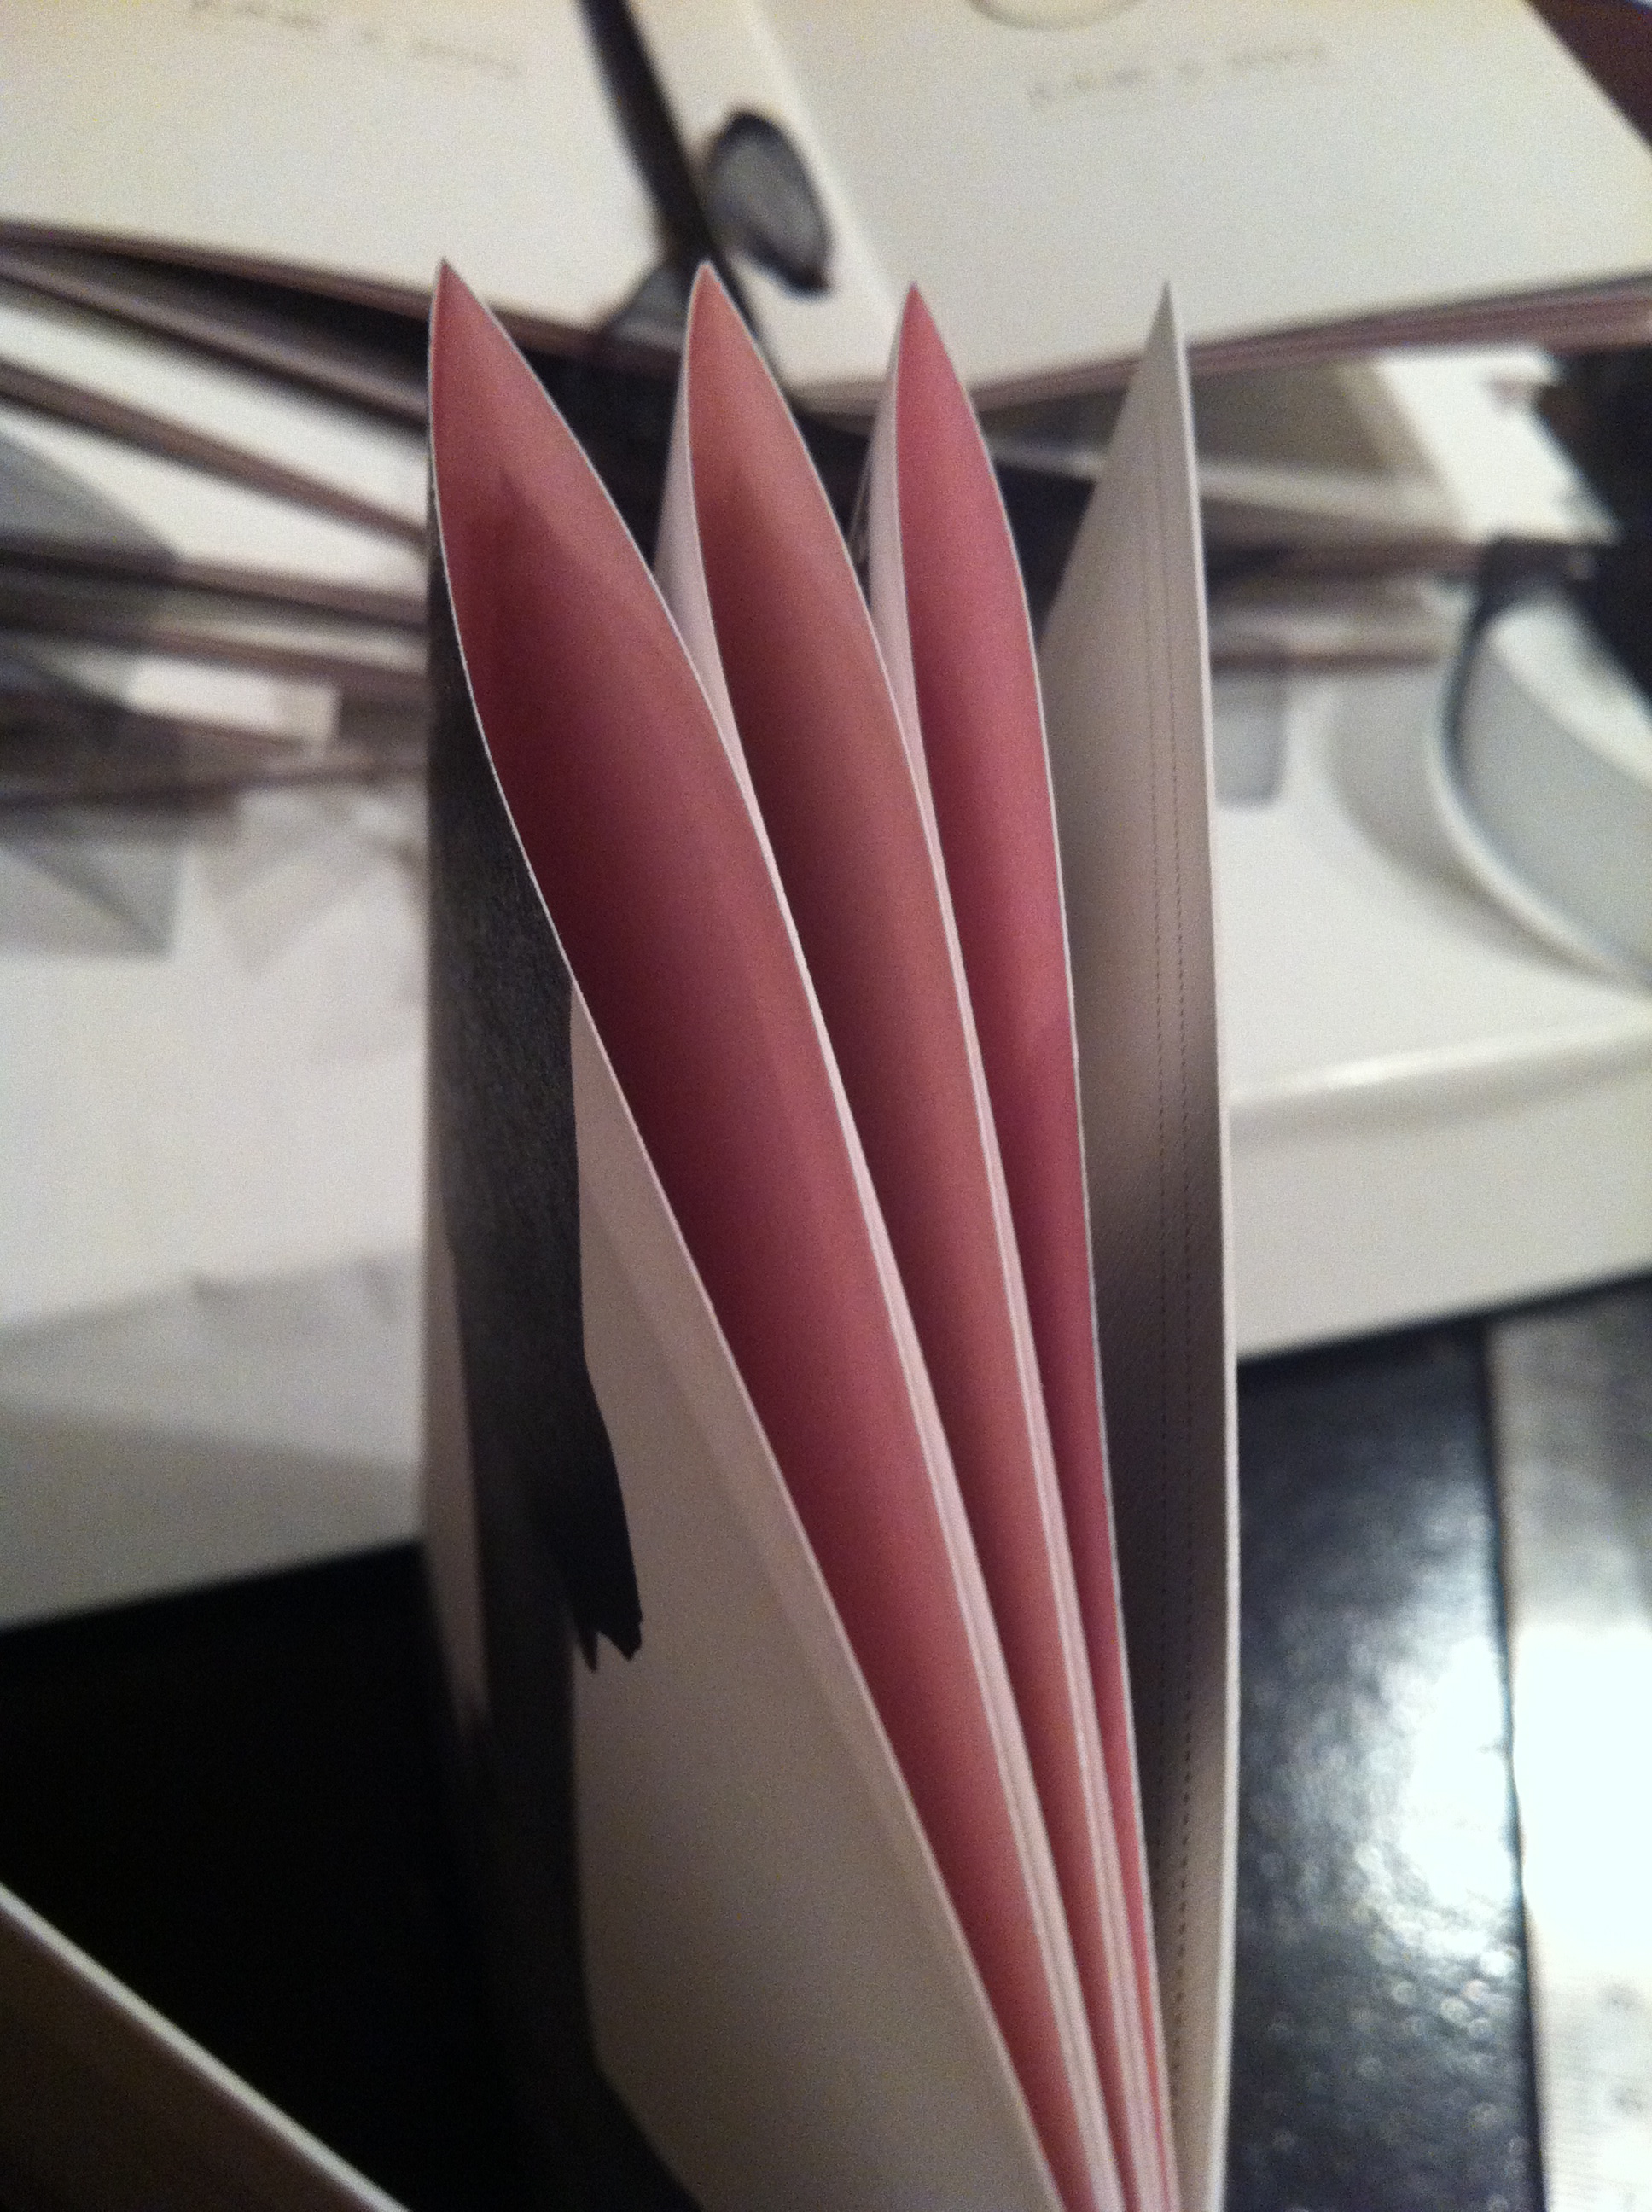
^ rose, champagne, chocolate and ivory (back side holds all the enclosures!)
you can see more images of deanna and stephen’s wedding here and here along with all the country chic paper (and wood!) goodness! so perfect for a southern-country-barn-ranch-farm-chic wedding :) if you’re interested in working together on your own custom design just contact me using the form below!
quick look :: cozy modern letterpress

i’ve been doing some organizing and found some of my favorite designs along the way…so i thought it’d be fun to share some quick snaps (forgive the not so great iphone snaps!) to kick off wedding season and provide some inspiration for all the new brides-to-be out there! big congrats if you’re one of them!!
with all this cold weather we’re getting, this first one seems appropriate! a cozy modern, wintery letterpress design with bright punches of neon green and navy blue. and, in case the main design being letterpressed isn’t enough texture for ya, we went a step further and did a blind woodgrain/bark pattern for some added detail and an all-over texture to this simple design. the woodgrain being white on white seemed perfect for winter and a little modern touch. and the double thick cotton stock was super dreamy.
there were also details cards, a custom map and a fun rsvp postcard, so to keep things on budget, we flat printed the remaining pieces. we then tied them all together with navy and white bakers twine and it all slipped into a shimmery navy envelope finished with a custom wrap label.
a superfun detail: the pattern on the label and some of the other pieces was custom-designed to coordinate with the brides dress! i just love little surprise details like that!
you can see more images of the wedding and stationery here! if you’re interested in working together on your own custom design just contact me using the form below!
yay 2014! so glad you’re here…
oh hello, 2014! SO glad you’re here!
i’m excited about the year ahead and beyond ready for a fresh start. a clean slate. a new beginning. and here you are! yay!
i have to admit, i get a bit giddy this time of year. maybe it’s because i need something to keep my mind off of the frigid, gloomy weather and something about starting a new year feels all warm and cozy and hopeful. whatever the reason, i’m excited for that spark of hope, feeling of newness and refreshed outlook that i have leading into each new year.
i don’t know about you, but i feel compelled to make lists of all sorts when the new year comes. (ok, all year long too) i definitely don’t consider my self to be type-A (not. at. all.) but i do love me some list-making. and love crossing items off of said list even more!
so, i’m ready to start my year with a list of all my hopes and dreams, random stuff i want to do and goals for 2014. nothing earth-shattering and not really resolutions, but just little things that are important to me.

i’ll also be starting a shiny new big ta-do pad (shown above!) to keep me on track with everyday tasks. i think these list-pads are so super fun (so much so, they just might make you want to pay attention to your to-dos!) and are one of my fave mtbs products. there’s a sheet for every week of the year, so now’s a great time to grab one! they’re not dated though, so you can start any time!
even though i’m not really making any resolutions, some of the goals on my list are your typical new-year resolutions…like loose weight, exercise, get organized, save money, etc.
seems like these never quite stick though. so i’m thinking that maybe it’s time to get a little more detailed about my goals and make them more of a lifestyle change. and, be held accountable by getting other people involved. a team effort!
at the top of the list…in 2014 i definitely want to loose weight and exercise more. eating better is of course a part of it, but instead of just saying “let’s eat better” we’re going to make an effort to shop smarter and plan better for each week. definitely not in a super rigid way, but a general plan will go far with us.
we’re also going to try and loosely follow what we already know about weight watchers. lemme tell ya it’s amazing what a difference it makes knowing how many points you get per day vs. how many points are in say, one margarita. (9 points, yo.) YIKES. makes you stop and think.
i’ve already cut waaaayy back on my delicious starbucks drink, so that’s a start!

^ luvo meal (formerly lyfe kitchen)
something that’s tough for us is how much we like to eat out. i mean, it’s fun, easy, and yummy. it’s a habit we’ve fallen into mostly because of how busy we are (which i don’t see changing any time soon). so for the days we can’t quite find time to cook and don’t want to go out, i’m planning on stocking up on these new gems that i found in the frozen food section at target. they’re SO good. like really good. and healthy!! for real. and i am the pickiest when it comes to any kind of chicken in frozen dinners. seriously. it’s usually some kind of rubbery “something” that just ends up grossing me out. blach. but not these…the chicken is like, real grilled chicken…texture ‘n all. result? i ate every. bite. they’re definitely a great option…though a bit pricer than your typical frozen dinner.
speaking of cost, eating out so much definitely gets expensive, so *bonus* this new plan will help save some cash too! though, i do have to say, for two people, depending on the place / food i’ve found that it’s NOT ALWAYS cheaper to eat at home. just sayin’ :)
another thing we’ve already been doing is sharing when we go out and aren’t starving. the way portions are at most restaurants we’re still full after splitting. less cash and less calories.
next, exercise. i’m going to start walking and doing yoga. and maybe some zumba classes (gosh do i miss hittin’ the dance floor!) but again, i’m going to come up with a loose schedule…like, mondays and wednesdays = walking, and tuesdays and thursdays = yoga. you get the idea!

i live on a lake so hoping to walk outside around the lake as much as possible. (despite the SUPER cold weather here. um, it’s summer in this pic. dreamy isn’t it?) it’s gonna be rough and will really take some motivation to start this adventure in january of all times, but i know me and know that i will get bored with walking on a treadmill inside. trust me. i’ve owned and sold one. and an elliptical. yea.
so i’ve been looking for routes of varying distances around parts of the lake on map my run. i might even get a fit bit to help track it all and keep things interesting. you can even pick a fun color band. win win!

then there’s finances…SO not fun. but i’m hoping to make it all just a bit easier by streamlining things. one thing i’m thinking of doing is setting up our bills so all are paid on just two days each month (two PAYdays, that is). autopay is my friend for sure, but it will still be a relief to just know everything is taken care of at once (errr twice), instead of on random days throughout the month. i’m also a big fan of things like mint to help track stuff.
another thing is i’m thinking of switching banks…to one that’s a bit friendlier with fewer fees and more mobile / online stuff to help with the ol’ streamlining.
i also stumbled on this money-saving idea reposted on facebook. what a great, super easy way to stash some extra cash. if you’re really feeling ambitious, increase the amount by 2x, 3x etc. per week and save a ton!
business-wise, i’ve got a lot of little streamlining and organizational type goals. for finances, i’ll be making better use of outright — it’s a great little tool for tracking your expenses and integrates with lots of other tools, too!

and with the new shop finally open, i’m going to be really looking at inventory organization to make filling orders a snap. i started getting all the paper goodies inventory organized in late 2013 but that was just a little dent in the madness.
i have a fun plan that i need to finish implementing but really i need a separate studio space to really get streamlined. ahhh someday. (this is what i dream of). but for now, i’m carving out little spaces throughout the house.

one thing that’ll help immensely is streamlining the shipping process. i’ve already got my shop set up to automatically calculate shipping from various carriers, which is awesome, but need a tool to help actually process orders and labels seamlessly. i’m considering shipstation or something similar.
best of all, i’m excited to start working on some shiny new products, too!!! 2013 brought over 100 new products with the launch of the paper goodies line which was cA-raZy to tackle, but exciting….i won’t be doing that big of a launch again soon but it really has been neat to see which products have been popular and where might be a good spot to add some new designs and some completely new products.
i’m also going to be getting my little branding + design side of the biz ramped up again to help other small businesses rebrand or launch a shiny new business. i super love this side of the business, so it will be fun for me to get back at it.
otherwise, i have a few new projects in the works that i hope to launch in the spring that will bring new products and a new part of the business, possibly with it’s own brand! stay tuned!
i’m super hopeful for the year ahead and ready for a really great 2014. so wish me luck (especially with the exercising plan!) i wish the best in the new year to all of you, too! happy happy new year! :)
xo
robyn
12/31/2013
oh 2013…
oh 2013, where to begin. you were quite the year, my friend….a good one but also a tough one that was full of challenges that, at times, seemed to be one. after. the. other. there were major misunderstandings. insulting situations. some big disappointments. oh and our house caught on fire. it was quite the roller coaster ride.
there were moments of being proud, humbled, excited, scared, stressed beyond belief, mad, sad, frustrated, confused, happy, determined, relieved and exhausted. let’s just say i definitely learned a lot this year…about everything…myself, my business, who my friends are, just how much pressure and stress i can handle and when enough’s enough.
so yea…you, 2013 were a doozy. don’t get me wrong though…there was lots of good this year, too! some really good things…so let’s go out on a high note and focus on some highlights, kay? :)
here goes…
actually, the year started off pretty great… i was selected as one of stationery trends magazine’s 10 designers to watch in 2013. a huge honor that i was so proud and humbled to receive. (and in great company!) so awesome.


then, january – april was pretty much a blur. i was crazy busy at work prepping for and art directing a photoshoot in LA — a great experience and saw some much needed sunshine!

i also decided to return to NSS this year (after sitting out in 2012)…so from january – april i was also in the process of finalizing my new line of paper goodies (over 100 new products!), and i decided to refresh the mtbs brand and build my own booth this year, too…soooo things were pretty crazy with lots of pieces that needed to fall into place leading up to the show in may.

just when things were starting to come together…we had a fire at our house. the week before NSS. not good. thankfully we were ok and the damage could have been a lot worse. but with the show just a week away, the whole thing was a logistical nightmare. we had to move to a hotel which made it absolute madness to finish getting ready, but, managed to pull it together (thank you times a million to my boyfriend jon and my good friend kate. seriously couldn’t have done it without you!)
i really wasn’t sure what to expect this year with the new line, but i knew i was really excited about it and proud of all the hard work i had put into it over the previous year and a half. at this point it was so great just to have made it to the show and have it all come together. that was almost enough right there!


but to top it off, the show was awesome…i was so happy about how well-received everything was. plus, i met some awesome new friends, caught up with some old pals and ended up reaching my goal of having my line in 50 stores by the end of this year! yippie!
after NSS we ended up living in the hotel for another month while they finished repairs and cleanup from all the smoke damage. we couldn’t wait to get back home.

once we finally moved back in, i spent most of the summer filling show orders…


but i managed to sneak in a quick little weekend getaway to the bahamas with my sister. ahhhh…a much needed break!


^ that’s me, windblown and catchin’ some rays :)
then a couple of almosts happened…
i got some amazing new contacts while exhibiting, too…some of which led to some really exciting opportunities. over the summer i was working with a major clothing retailer that was planning to carry a special line of my note cards that i’d customized just for them to coordinate with their holiday collection. it was so exciting…i’d signed on the dotted line ‘n everything! but it fell through at the last minute when they pulled all “gift” type items from their plans. *sigh* (major sad face) still, an amazing contact to have and i had a great experience working with them, learning along the way. maybe next year!
around the same time, i was contacted by two big magazines (one being my absolute favorite. what a DREAM email that was to receive!) … both were interested in featuring items from my holiday line in their december issues. so. exciting. then those fell thru. again. both of them. at the last minute. *super sad face* ahhh! thiiiissssss close…seriously, had any one of these worked out it certainly would have made for a very different (read: awesome!) holiday for mtbs…fingers (and toes) crossed for next year! :D
the year wrapped up with something ALMOST as exciting…just before the holidays i FINALLY launched my new shop, which had literally been years in the making (so. many. delays.). so it was really really great and a huge relief to finally open the shop’s virtual doors in late november.

there were other lots of other little victories, fun adventures and happy dances along the way. but that’s the quick highlight reel with some almost-super-awesome moments mixed in :)
it’s kind of crazy how taking a minute to stop and reflect on the past year can give great perspective heading into the new year…celebrating the good stuff and letting go of the not so great stuff. i’m ready for a fresh start and to leave this year behind and make 2014 a great year. i’m hopeful, super excited and can’t wait to see what new adventures it holds.
so here’s to a super happy, shiny + bright new year for all!
xo
robyn
12/09/2013
fab gift picks :: 02

oh, hello! back with more gift-picking fun! (gosh do i love shopping!) today’s guide is full of shiny + bright finds from notepads to get organized with (these are both shiny AND bright with fun colors and shiny gold edges!) to fun hair ties to shiny lip balm. and they all happen to be some of my favorite things that i just might be hoping to find under my tree! make sure and check out yesterday’s mint + gold gift pair, too!
a. big ta-do™ list pad / b. glitter pumps / c. bow ring / d. stripe tee
e. hair ties / f. lip balm / g. fragrance
happy shopping!
xo
mtbs
fab gift picks :: 01

i’m getting super excited for christmas and have been spotting some awesomely giftable goodies, so thought i’d share some of my fave gift picks!
kicking it off with just a couple cuties in one of my fave color combos — minty green and shiny gold!
first, (a) our very own mtbs golden notes set — a fun journal/jotter pair with shiny gold foil “notes” on the journal! and (b) a sweet leather luggage tag with fun gold details by my fave, jcrew. both make great stocking stuffers and are perfect to take along on a fun holiday getaway!
check back for more gift-picking fun!
xo,
mtbs
12/02/2013
cyber monday SALE!

pop on over to our shiny new shop and SAVE! this is our last shop-wide sale of the year! so hurry and don’t miss out!
20% off everything plus FREE SHIPPING on orders over $50! HOHOHO! happy shopping! :)
11/27/2013
shiny new shop. is. OPEN!!!!!!
oh, hello there! just checking in with an UPDATE! and it’s a good one…i couldn’t be more excited to FINALLY be announcing that the new SHOP IS OPEN!!!!! yay hooray!!!
you know…the perpetually-almost-done shop? yep, that’s the one! and it’s finally ready!!! yippeeeee! (did i mention i’m excited?!)
you guys, it’s been SO long in the making. we’re talking years. (but you already knew that if you’ve been following along) all the thinking, planning and researching…then the something like two years in the ACTUAL making. aside from all the delays the shop has gone through lots of iterations and evolutions as my brand and product line evolves…it’s been a true labor of love…but here we are! open for business…and just in time for the holidays!! hooray!
i’d LOVE if you’d stop by to check it out and share with your friends too! there’s tons of fun stationery + paper gifts, plus iphone cases and gift wrap to wrap it all up! or, we’ll gift wrap for you in our signature look!
follow me on twitter, facebook and instagram to find out about all that’s shiny + new (and SALES + GIVEAWAYS!!)
happy shopping!!
xo
mtbs
11/07/2013
a shiny new shop. just in time for the holidays!

time sure is flying! can you believe the holiday season is right around the corner! um, me either!
i loooove the holidays but i’m even more excited this year…why, you ask? because i’m getting an early christmas present!! i am FINALLY (seriously. if i could make this bold times a million, i would!!!) about to launch my shiny new shop!!

if you have followed along for a while, you know that this shop has been FOREVER in the making, perpetually almost ready and a major labor of love. i cannot WAIT to get this shop opened up for you all to see ….. and just in time for holiday shopping! eek! which is perfect, because we’ll even have a gift-wrapping option for most items!
the shop will have the full line of mtbs paper goodies — notepads with shiny gold gilded edges, note sets and notebooks, gift wrap, holiday cards (including new photo cards!!) and everyday greetings — and accessories like iphone cases and more…all with tons of fun color and shiny gold foil (of course!). plus, we’ll be adding our whole wedding line in time for wedding season! yippee!!


we’ll also be doing some giveaways, so make sure to follow us on facebook, twitter and instagram and sign up for our newsletter to be the first to know about the launch and to get a superfun deal! you can sign up here and it’s super easy to share with your friends, too. which we’d super appreciate! :)
stay tuned for more and sign up to stay in the loop!
xo
robyn
all holiday photos by caroline and evan photography
10/15/2013
custom couture // seaside simplicity
hi there. i’m epically behind on blogging and sharing what’s new in general. so, this week, i’ll be catching up and sharing lots of newness from oh the last year or two :)
to kick it off, let’s start back at the beginning of the year….
i’ve been so excited to share a new custom design done in collaboration with my super-talented pal robyn at designs by robyn love calligraphy.

calligraphy by designs by robyn love.
the wedding took place in key west and the bride was looking for a super simple yet elegant sea-inspired design…and watercolor was a must. i’ve sooo been missing painting and drawing so i was super excited to take this on. especially since i was working on these in january and loved looking at pics of the sea for inspiration!
i created the design and robyn helped with watercolor calligraphy accents. LOVE! we went around a few times on the calligraphy font and getting the colors juuussst right and eventually landed on what you see here. i just LOVE the way it turned out.
there were tons of pieces for this event…we started with the invitation — a simple, typographical design that had an subtle ombre look, capturing shades of blue found within the sea.


the enclosure cards followed the same simple look and the envelopes were lined with watercolor striped liners, which i so loved hand-painting then editing to strategically give them refined, straight edges for a more modern look, while the inside of the stripes remained a fabulous watercolor texture.
the look carried through the day-of accessories which included table cards and signs, place cards, menus, thank you and welcome notes, all flat-printed on luxe cotton stock. we even doubled up the stock on some pieces to get an uber luxe double-thick feel. swoon.

we’d love to work together to create a custom couture design for you, too! drop us a line and let’s get started!
08/30/2013
growing

oh, hello!
just checking in here! is it seriously the end of august?! sheesh. time just keeps flying by and posts (i mean to write) keep piling up. (like, remember that stationery show in NY. yea. that was 3 months ago. i’ll post about it someday!) but it’s all for good reason…lots of growth in the past few months. which is super awesome and tough all at the same time.
we are literally buried in boxes of new inventory (somewhere in the neighborhood of 60+ boxes at the moment in a-not-so-big-space) so things have been busy around here, filling orders from said stationery show and getting my perpetually-almost-done shop ready to launch.
oh, the shop.
you know, the one i’ve been talking about for, oh…EVER.
i just keep reminding myself that it’s all going to be sooo worth it to have a shop that is super custom to fill with all the new goodies, that works the way i want it to and to have all my products under one virtual roof. it. will. be. awesome. ahh. i feel better just thinking about it all being streamlined and integrated with some awesome organizational tools for shipping, inventory, taxes (ewwww), marketing and more. but that’s just all the behind-the-scenes stuff that’ll make my life easier! :)
but the stuff that will make it superfun to shop at the new mtbs…all the shiny new goodies and a super-clean design…not to mention an online customizing tool (phase 2) that will make it really fun to shop for invitations and photo cards so you can see a preview of what your order will look like — even before i do! (um side note, this part has actually been in the works on paper/in my head since ohh, 2009?! omg.)
we’re going to be launching in phases — the main shop with all the new goodies first and then add on the customizer and some other functionality updates in the next phase. can’t. wait. (<—understatement!)
i’ve also got a fun “studio” makeover plan brewing that definitely calls for a blog post (or three). right now everything is in complete disarray as things grow and inventory piles in box after box. (i’ve resorted to begging my printers to keep some stuff for me. yea.) so it’s high-time to get creative with this limited space, ikea-style and see how that goes.
one part i do know about this “studio” plan is there will be something like this in front of my work table (ehem read: dining room table that we never eat at!). there’s a perfect nook for it, and i’ve already got it mapped out what will go where — i am definitely thinking of something like this for all my greetings and note card inventory…seems like a nice visual system for sure! (totally check out the whole blog post for a look at the swoon-worthy hello! lucky studio). and then envelopes will be stacked neatly in their boxes with an envelope stuck to the front for easy color searching.
gift wrap sheets will be stored flat on wide shelves, and all my packaging and shipping stuff will be within easy reach (hopefully on a super-wide shelf integrated into the shelving system at about table height. perfect for easy order picking and packing in one spot.) ooo and would LOVE to have this integrated in this area too…how handy for printing packing slips and shipping labels!? seriously genius.
if you want to check out some really dreamy spaces, i’ve collected lots of fun studio and organizational inspiration on pinterest. love.
i’ll be sure to share as i DIY my organizational disaster into a hopefully super-streamlined inventory system and workspace. and also will keep you posted on the shop progress. promise. and be sure follow along on instagram for all the latest snaps of new products and goodies heading out the door!
in the meantime i’m going to try to get some posts up highlighting some of the fun new products and all the new shops that have been added. i hope there’s one nearby and you’ll stop in to have a peek at all the new stuff!
anywho, that’s the scoop for now! stay tuned for more soon!
xo
robyn
06/30/2013
the big ta-do™

oh, hello! just another quick post to introduce one of my fave new products that launched at nss last month…
leading up to nss i was virtually swimming around in endless to-do lists. i’m not the most structured person on the planet, but i still think it can be super overwhelming if there’s no structure and just epic lists everywhere.
that’s where this shiny new product comes in…
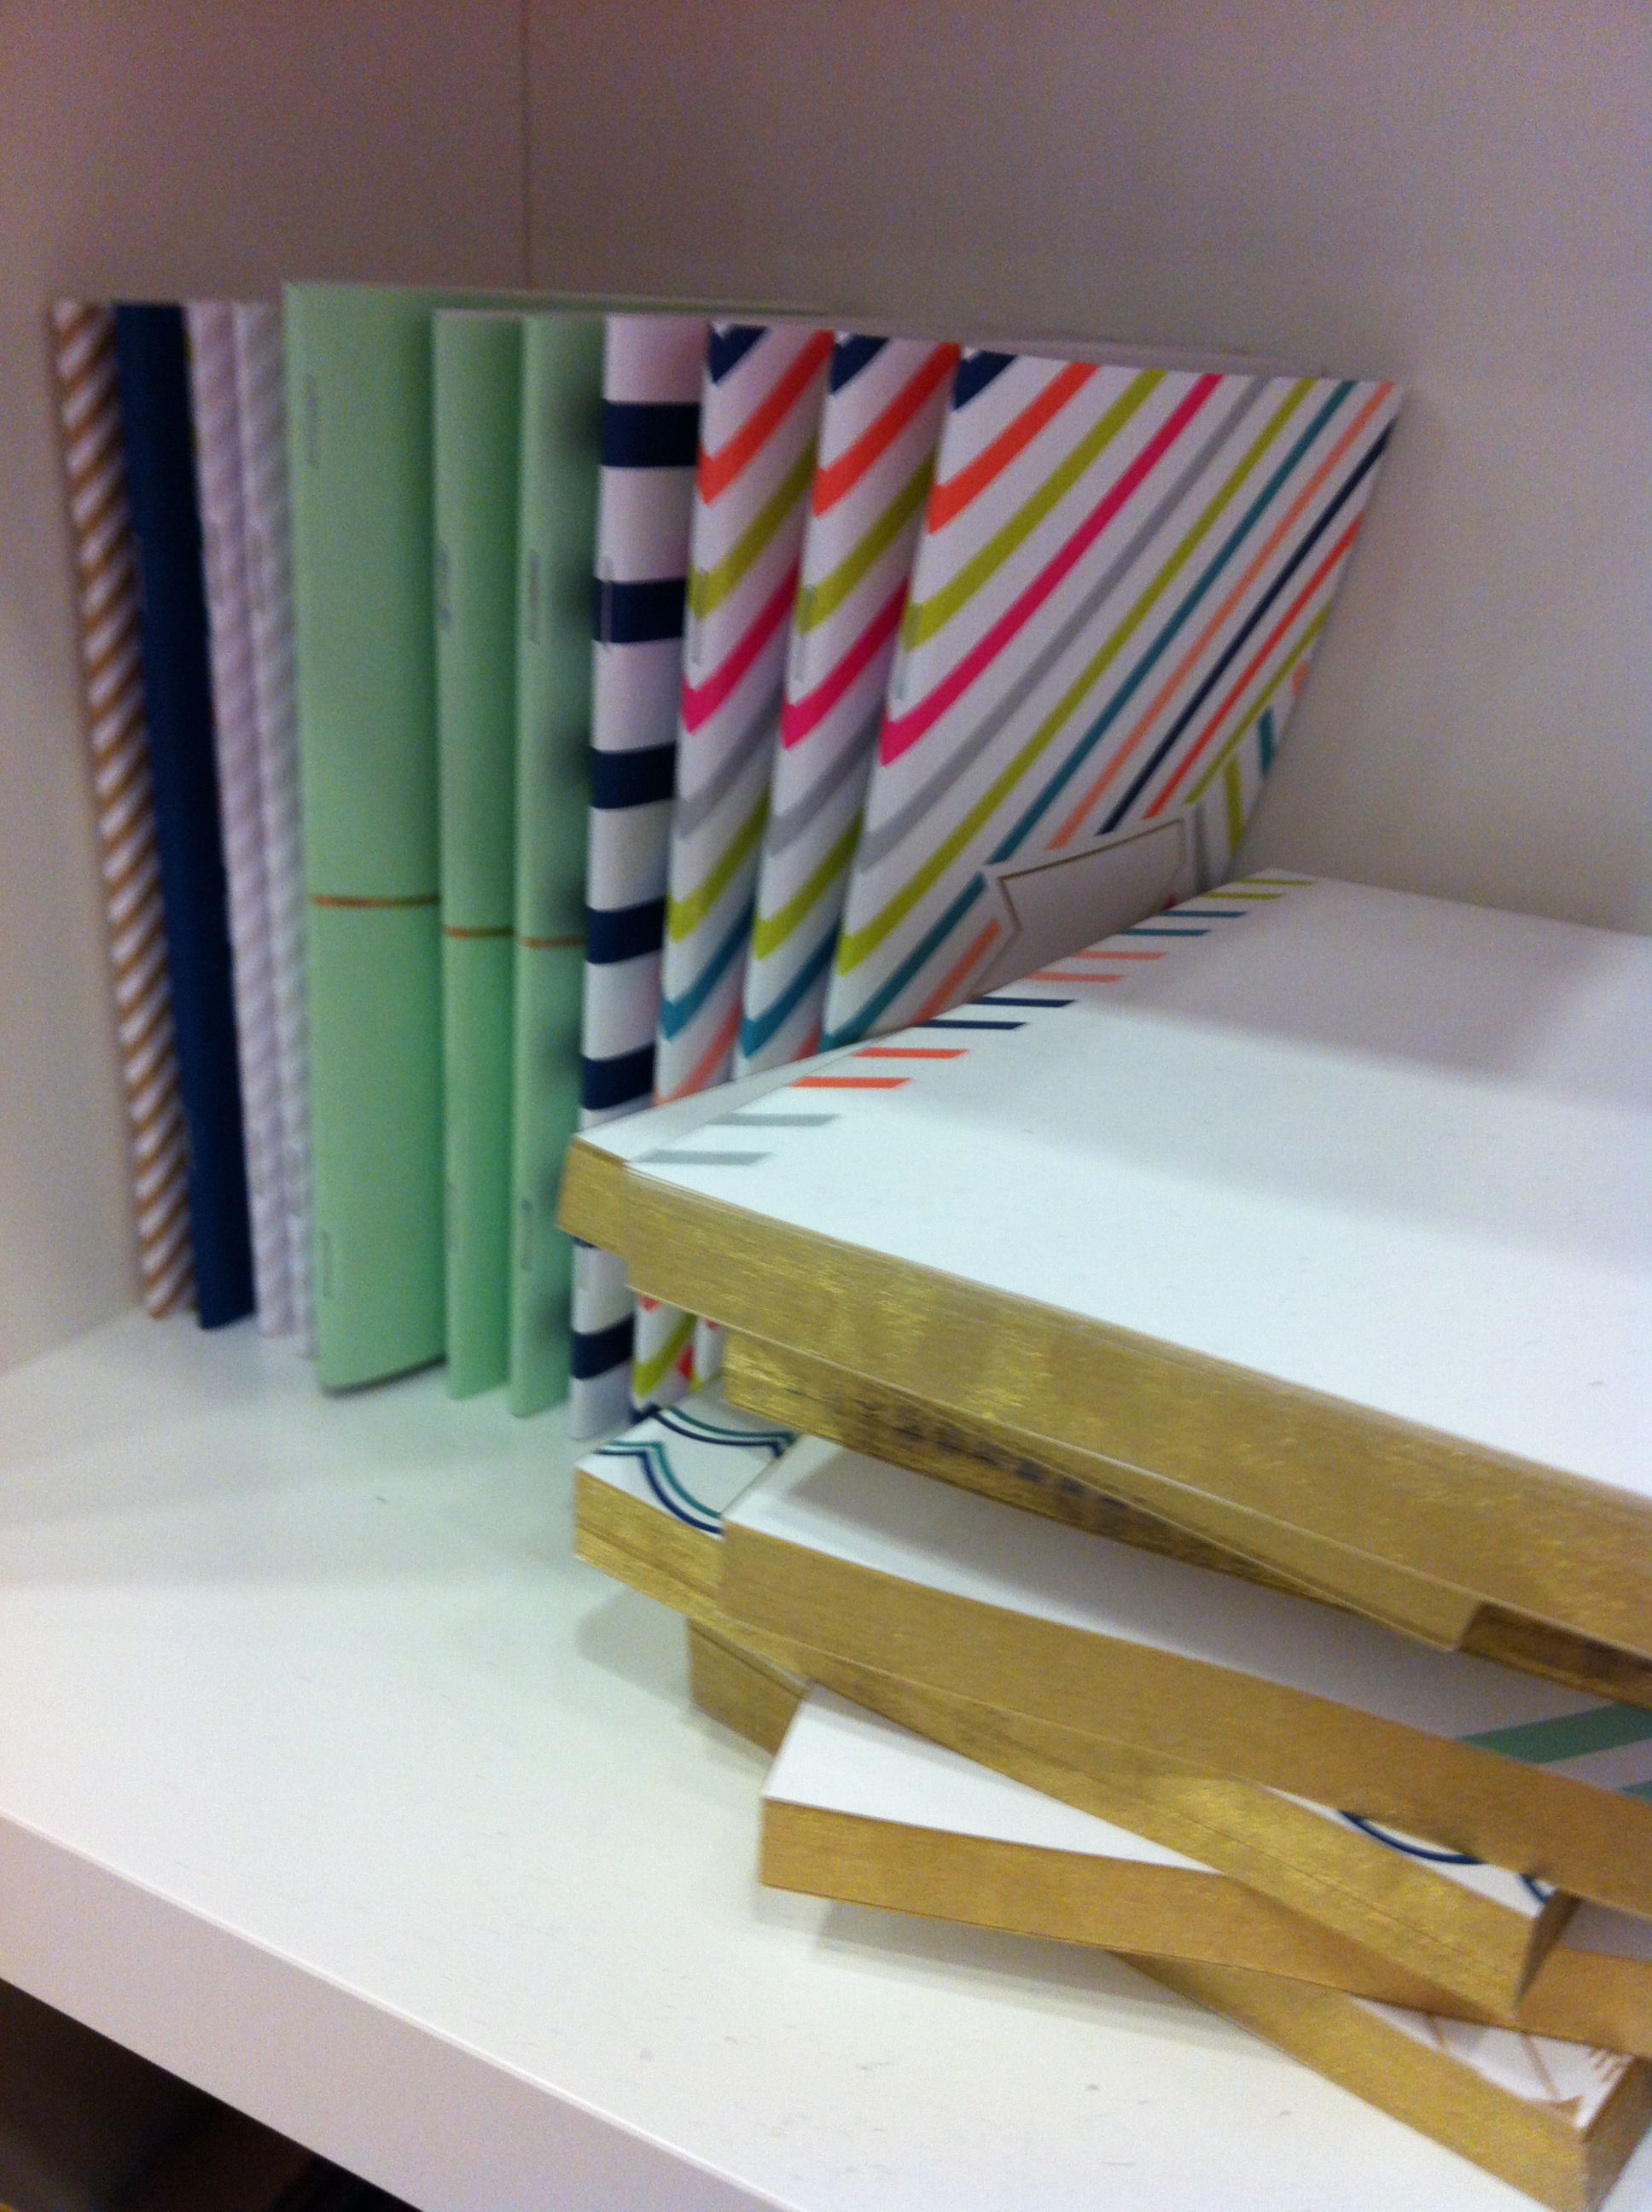
enter: the big ta-do™! it’s an oversized list pad with 52 sheets, one for each (work) week of the year, sectioned into manageable mini-lists. the end result might still be a long list, but filling out action items for each day makes it all seem a bit more doable. and, each day is perforated so you can tear off that mini list to keep handy on the go, or keep it all together for an overview of your work-week! (better pics coming soon… above: an iphone snap at nss)
and, there’s nothing better than a superluxe notepad sitting on your desk to inspire you to get ‘er done. so we made big ta-do™ kind of a big deal :) with 52, 7 x 14″ perforated cover weight pages wrapped in one of four fun colors (aqua, raspberry, papaya or lime juice) and finished with shiny gold edges. *swoooooooon*
these lovelies will be available in tons of new stores around the country in just a couple weeks and in the shiny new mtbs shop when that’s done, too!
let me know if you are interested in pre-ordering to get your hands on one hot off the press or if you have a retail store and are interested in carrying these in your shop!
xo
robyn
06/29/2013
it’s been waaaayy too long!

a big hello! and whoa. it’s been FORever! i’m still here and a super busy bee (hence the looong silence!). soooo much has happened in the past few months! i have lots of fun new stuff to share in the coming weeks!
for now a few quick things…
first. the mtbs brand got a little makeover!!! SO excited about it… it’s so me and (i think) the perfect evolution of my brand.
the updated logo incorporates a version of my “happy arrow” design (that i’ve been having so much fun using in a few new products too!)…it seemed like a perfect fit and the “mark” that my brand has been missing. i thought it was such a fun way to incorporate more of my full color palette into the logo, too! and it complements the candy stripes pattern i use as an accent graphic and in lots of products too!
oh, and the update also involves the touch of glam i’d always planned to incorporate — shiny gold of course! ahhhh. just right. all these little details add up to the “casual luxury” aesthetic behind my designs and the perfect look for mtbs. i hope you love it!
me and my shiny new brand went back to nss this year too, with over 100 new paper goodies and a shiny new booth design in tow! (we built it this year so lots more to come on that!) it was tons of work but the show was AMAZING. insane as always (especially the prep leading up to it topped off by a house fire the week before the show! we had to move out for over a month!!! :/ ) but, it all worked out and the show went better than i could have hoped for — tons of awesome new stores added (updated list coming soon!), some super amazing new connections made and maybe the best part…catching up with old friends.
now, here i am (in nearly the middle of summer(??) seriously. where has the time gone?!) busy filling nss and wedding orders, working out details of some exciting new things (!) and definitely trying to take take in the summer while it lasts!
that’s the quick update for now! but the whole new line will be available in my new shop — which yes, is STILL in the works. *sigh* BUT is getting very close and am hoping for a launch still this summer.*fingers and toes crossed*!
BUT, you can still check out the paper goodies catalog and let me know if you’d like to order something! or if you have a retail store and would like to carry mtbs in your shop, drop me a line!
ok, that’s all for now! but stay tuned for lots more updates and an nss recap too!
xo
robyn
04/01/2013
20/13 peacock invitation sale!!

sooo we usually do this in january but…. well, it’s never too late for a SALE! so here it is! the decadent peacock feather invitation suite, our most popular luxe design, is on sale now thru april 10*!
20% off of orders of 250+*
OR
13% off orders under 250*
even better? the sale is on ALL of the peacock accessories too! save the dates, menus, place cards, escort cards, table numbers, seating charts, programs, thank yous and more!
email for pricing details and to place an order
*minimum order of $500. book by april 10 and pay in full for your order to receive the special discounted rate. discount level is applied per item/quantity ordered, not total of all pieces.valid on decadent peacock suite orders only. discount does not apply to assembly cost if that option is selected.
02/09/2013
meet the style library designs :: tee time

next up, from the perfectly preppy collection — the tee time design.
……………………………………………………………………………………………….
the tee time design was created for a preppy pair with country club style. they swoon over fun colors and sweet details. and since they met at a company golf outing…naturally he got down on one knee on the green.
……………………………………………………………………………………………….
about the style library…
at mtbs, we are all about color, pattern, simplicity and something for every style and budget. so this, and all of our designs can be customized with colors and fonts and printing to fit with your personal style. then, dress it up even more! add envelope liners, bellybands and backing layers to mix and match pattern and color to create a one of a kind look!
each of these designs (and more!) will be available in our online shop (launching soon!!) and are already in stores nation wide! check out our list of stores on our website to find a retailer near you! or contact us directly if there’s not one nearby :)
if you’re a retailer interested in carrying our line, please contact us and let us know which albums or products you are interested in!
awesome photos by caroline & evan photography / styled by every last detail
meet the style library designs :: cabana chic

next up, from the perfectly preppy collection — the cabana chic design.
……………………………………………………………………………………………….
the cabana chic design was created for a the couple with sophisticated, seaside style. their taste is impeccable, but they’ve got their casual side too. in fact, they’re the perfect mix of casual and luxury…and certainly don’t mind getting sand between their toes.
……………………………………………………………………………………………….
about the style library…
at mtbs, we are all about color, pattern, simplicity and something for every style and budget. so this, and all of our designs can be customized with colors and fonts and printing to fit with your personal style. then, dress it up even more! add envelope liners, bellybands and backing layers to mix and match pattern and color to create a one of a kind look!
each of these designs (and more!) will be available in our online shop (launching soon!!) and are already in stores nation wide! check out our list of stores on our website to find a retailer near you! or contact us directly if there’s not one nearby :)
if you’re a retailer interested in carrying our line, please contact us and let us know which albums or products you are interested in!
awesome photos by caroline & evan photography / styled by every last detail
meet the style library designs :: gramercy park

next up, from the perfectly preppy collection — the gramercy park design.
……………………………………………………………………………………………….
the gramercy park design was created for a preppy pair with modern style. they love pattern, but want something classic, yet with modern sensibilities. oh, and they’re not afraid of color! they love to take strolls in their quaint downtown and wouldn’t miss a round of golf at their posh country club. you can bet they’ve got a super chic event planned.
……………………………………………………………………………………………….
about the style library…
at mtbs, we are all about color, pattern, simplicity and something for every style and budget. so this, and all of our designs can be customized with colors and fonts and printing to fit with your personal style. then, dress it up even more! add envelope liners, bellybands and backing layers to mix and match pattern and color to create a one of a kind look!
each of these designs (and more!) will be available in our online shop (launching soon!!) and are already in stores nation wide! check out our list of stores on our website to find a retailer near you! or contact us directly if there’s not one nearby :)
if you’re a retailer interested in carrying our line, please contact us and let us know which albums or products you are interested in!
awesome photos by caroline & evan photography / styled by every last detail
02/07/2013
10 designers to watch in 2013!
i got some amazing news a few months ago, and i’ve been waiting on the edge of my seat to be able to share the exciting news…well, here it is!!! i was selected as one of stationery trends magazine’s 10 designers to watch in 2013! i’m so honored and humbled to have been selected, and in great company no less! you can check out the full list here or order a copy of the magazine and see all the awesomeness that is stationery trends :)
here’s a look (below) at the cover and my feature page! eeeeeee!! (click to make it bigger so you can read)
thanks again stationery trends for the great honor!


all images via stationery trends.
01/23/2013
nss prep school :: booth details
more trade show talk today…i’m trying super hard to catch up with some nss detail posts, so here’s one i’ve been meaning to do for a loooonnngg time (pretty much since after nss 2011!).
so without further ado…
this goes along with a post you may have seen last week with a fun infographic about something not so fun — budgets. the infographic made it more fun, but now it’s time to get serious. well, not really. but we’ll at least talk specifics and get into a bit more detail about costs and options for saving money etc. first lets, talk about the booth… (and please excuse the not so great iphone pics!)

your booth is pretty much your storefront for the 4 days you’re doing a tradeshow like NSS. your booth should represent your brand and be designed to showcase your line. it’s not so important whether you use curtains or foam or hard walls as it is that the space is well constructed and styled to reflect your brand and line…and is of course cohesive with everything else from your show mailer to your website…
……………………walls……………………
depending on your budget and style, there are lots of options for the walls of your booth…let’s start with the most basic…
CURTAINS: these actually come with your booth (yay for that!) but they are not anything particularly special…they may work for you if you have a more earthy or vintage brand since they’re a neutral color and what i believe is a cotton of some kind. (maybe?) most people don’t use the provided curtains, but that doesn’t mean curtains are not a viable option…. you can certainly bring your own curtains that are a perfect reflection of your brand — maybe in a bold color, silk finish or zigzag pattern…whatever goes with your look.

above : the curtains and sign that come with the booth.
budget wise, curtains are the least expensive option. the cost is pretty much whatever curtains cost….so, like anything, you can go economical and grab some from a store like ikea or you can splurge at store like restoration hardware! it just depends on your budget and the look your brand calls for.
FOAM WALLS: these are probably the most popular type of booth walls at the show, especially for smaller companies and first-timers. why? they look great (like real walls!) and are fairly inexpensive, again, depending on the look you’re after, budget and booth size you have. one thing that’s for sure is that these go up right in front of the existing curtains and are typically zip-tied to the pole frame. but there’s a variety of ways to go about getting foam walls…
- DIY: if you just want plain (white or solid color) walls, and are the DIY type, you’re in luck! because you can by your own large sheets of foam board at an art supply or set design shop or other similar stores and have it delivered to javits (buy local and save on freight!)… just make sure they’re flame retardant! a SUPER important show rule.
- HIRE OUT: if you’re not the DIY type, you can use an exhibit company for your walls (and lots of other stuff!). they can do them in white or even pms colors so you can match your branding…they are more expensive than the other options mentioned here, but include installation and provide peace of mind knowing that it’s all set when you arrive at your booth. several exhibitors go this route.
- SORT OF DIY: somewhere between DIY and using an exhibit company to do it for you, is the option to source your own foam walls and hire union guys to help you set them up (or set up yourself). this is what i did my first year…i used foam walls but wanted an all-over printed pattern. despite originally planning to go with option 2 above where it was all set up when i got there, it was not in my budget given the wall printing i needed. so i found my own source to order printed foam walls from (they even flame proofed for me) and had them shipped direct to javits. the cost was less, but somewhat close to doing the plain, installed, solid colored walls mentioned above. BUT, i got the look i wanted for my brand. it was perfect! though, not really re-usable. so while foam is great and fairly cheap for a really pulled together look, it doesn’t get you further than one show.

above: my printed foam walls and carpet, mid set-up.
HARD WALLS: ahhh, the “real” walls :) these are the most pricey OR most time consuming option depending on how you go about it. hard walls are typically made with a base of plywood or other hard material (maybe even actual drywall for some of the huge companies??)…and then painted or finished in another way (people get super creative!) so the cost varies widely. but this option gives you the opportunity to really do some unique finishes. (adrienne from dingbat press is AMAZING at this! check out her blog to see her booth form the last couple years and more planning info!) and also are more durable so these are typically reusable for future shows. here are some ways to go about it…
- HIRE OUT: using an exhibit company to do hardwalls for you is going to cost you…more than having them do foam walls for sure, however, the price can vary depending on many factors. there is an option (a somewhat strange concept) to RENT your hardwall booth. basically, the exhibit company will create the booth from your design, but you don’t really own it. and also therefore do not have to worry about storing or shipping or installation of said booth. you just show up and it’s set up for you! (like the installed foam walls above). but in this case you would contact the exhibit company prior to the next show and discuss using the booth again and modifications you might need to make, if any. an easy-breezy-peace-of-mind option, but a pricey one.
- DIY: again, if you are the DIY type, you can create an entire booth at home and use a freight company to ship it to the show. or drive it there yourself! driving there is the (possibly) cheaper option but depends of course where you are driving from vs the cost of flying + freight…and parking in NYC…but, this point spills over into travel, so more on that in a bit!but if you price out the materials at the hardware store needed to DIY, you’ll quickly start to see the savings for creating your own hardwall booth. HUGE savings. so much so, we’re talking possibly less than foam (installed walls option)! BUT, enter lots of hard work, mega planning (and carpentry skills!) and freight cost. however, with great planning you could use this fabulous creation year after year! yay MORE savings! plus, going this route you can still request union help to set up/tear down and pack up your booth to take back home OR, choose to store the booth in a warehouse near the convention center. this is a good option if you want to use the same exact booth year after year and only plan on doing shows in that area. BUT, it does make it difficult to modify it if needed, since it’s not in your possession or being stored with a company that can modify it for you. but LOTS of people do this.
……………………furniture + fixtures……………………
like the walls, there are lots of ways to go about this, and all depends on the look and budget you have. but one thing is for sure — every booth seems to have furniture of some kind…whether a seating area with couches or a counter area or even just a chair or two. (psst…chairs are key —you’re likely going to want something. even just to sneak a quick rest — it’s a looooonnng day of standing and buyers appreciate the break too when they’re in your booth!) here are some options to consider…
- USE YOUR OWN: lots of people bring things they may already own, or will invest in pieces they can see reusing at future shows or in their home or studio. doing this is an awesome way to save some cash in the long run (and get some fun new stuff for your house!) especially if you are planning to ship freight anyway.
- BUY IT: an alternative to using existing pieces is to purchase new items (of course), but consider having them shipped directly to your booth. you can also ship stuff to most hotels (check with yours to make sure). but, don’t forget you have to get said items to javits from your hotel. that’ll be tricky if they’re bulky like a chair or table! then, you’ll of course need to ship them back home or store them with your booth if you go that route. or, depending on the items, some people just leave them behind if it’s not worth the cost of return shipping (or they’ll sell items to passers by at the end of the show!)
- RENT IT: another route is to rent furniture…a great way to get some unique pieces without breaking the bank! while there are tons of things available through exhibit companies, don’t forget about local event companies too! it’s NYC after all so there are TONS of neat places with really unique stuff if you are looking to go a different route.i loved renting and will likely do it again. especially for things like ghost chairs (just $15 each to rent!) that are a pretty penny to purchase…and when i first exhibited i was not psyched about the idea of shipping larger items back and forth. i don’t know why but it just scared me :) i think just because it required a pallet or crate and i just thought whoa. was just another thing that i’d not done before and was my way of eliminating one unknown. but this year, i will likely take the plunge and go with a freight shipment. stay tuned :)

above: the ghost chairs i rented
……………………fixtures……………………
fixtures are completely based on your products and how large your line is.
- BUY IT: lots of exhibitors will buy their own shelves or cabinets and reuse year after year. this may be what i do this year, at least in part. ikea is an awesome place for this. their products are pretty durable, inexpensive and usually pretty lightweight (makes for cheaper shipping!) in particular the picture ledge shelves and billy bookcases and expedit shelving units are popular items…as are many others! again, depends on your look, but there are lots of basic items there that you can finish or modify to fit what you need (again, check out adrienne’s booth!) there’s even an ikea delivery service in the NYC area! people use it for last minute/emergency items or just as a way to skip the chaos and shipping. a great way to save is to go in with a group at the show and split the fee for delivery.
- RENT IT: another route is renting fixtures and display units. either existing pieces or, you can even design something yourself and have it built! (see below) yep, a custom designed piece that you can rent! crazy! that was the route i went my first year…i launched a collection of wedding albums and a small line of boxed imprintable invitations and wanted a piece that would showcase the albums. so i used my walls to display pieces from each of the four collections and the cabinet i designed (below) to hold the actual books and boxed invitations. this worked out really well for me. and though it was pricey, it was the centerpiece of my booth and really helped to highlight my collection and gave buyers a comfortable spot to peruse the heavy albums. plus it was the main fixture/furniture in my booth, so i felt ok to splurge on it :) and i can reuse if i want and don’t have to worry about storing/shipping because it’s owned by the exhibit company. win win!
below: snaps of the cabinet i designed and had built by manny stone

above: my cabinet in the aisle before making it into the booth, and a bit of dingbat’s booth with hard walls in the background :) she silverleafed the walls! so neat.


……………………lighting, flooring and signage…………………...
once you’ve got your walls and furniture set, it’s all about the finishing (but super important) touches. things like lighting, flooring and signage. the reason i say they’re finishing touches is because while they’re important decisions they didn’t seem AS monumental as the walls and furniture decisions. maybe just me though! :)
……………………lighting……………………
there are tons of ways to go here too. initially, one might think that a huge convention center would provide enough overhead lighting. not true! you really want your work to shine (no pun intended!) and the best way to do that is to make sure it is properly and adequately lit…not just so people can see it, but so that it photographs well too! especially for when bloggers and other members of the press come by and want to take some snaps!


above: a peek at the clip-on lights
- BUY IT: an easy, effective and inexpensive option is to use clip-on lights. mine were from home depot and were $10 each. much, much cheaper than going through an exhibit company and there are similar options at stores like ikea, lowes, target and wherever else sells these kind of lamps! but like everything else, depends on what you’re looking for! also, consider a chandelier, tabletop or floor lamps to highlight products if those work with your booth design. a note: chandeliers may require approval to be hung or will need to be installed by the union workers if it needs to actually hang from the convention center ceiling. (something i had to eliminate last show due to the huge installation fee. sigh.)
- RENT IT: alternatively, you can rent lighting from an exhibit company who works with javits and the union to complete installation. or can request lighting directly from javits…they can provide you with a parcan — a big spotlight — that is hung in the rafters and positioned to highlight your booth. they are on the pricey side but give off great light. i added one at the last minute (on site at the show) and it cost much more (somewhere around $400 instead of about $300!!) than if i had ordered early. lesson=learned!
ELECTRICITY & INSTALLATION: this is a separate fee and a must for having any lighting in your booth (other than a parcan). and this fee is pretty minimal in the grand scheme of things. just make sure to bring some extension cords and a power strip to plug your lights into along with any electronics you may have (cell phone, laptop etc).
……………………flooring……………………
another item that has a lot of possibilites is flooring. carpet, or wood or masonite or??? the sky’s the limit. one big thing to consider though…COMFORT! it is a loooonnggg day of standing and buyers definitely appreciate stepping into a cushy booth floor! :)

above: jon and our union guy working on the carpet tiles.
- BUY IT: again, this is an area that you can easily buy and repurpose for future shows. even if you end up changing booth sizes it might be possible to add on to your existing flooring if that product is still available. this is the route i went with. i bought interlocking carpet tiles from an online store and had them shipped directly to my booth. (i ordered sample swatches first to pick a color) and after the show, i packed them up and shipped them home. easy breezy and not a huge package to deal with.
- RENT IT: yes, you can even rent flooring! an exhibit company is probably your best bet here. they’ll provide you with options for carpet or laminate flooring and install and remove for you. of course, this is then an ongoing cost but is not TOO bad.
whatever flooring you go with, consider adding padding of some kind underneath. some carpet tiles are available in various grades — think economy, standard, premium — but you can still add extra padding. if you do, your floor will be raised a bit but it’s worth the comfort!
……………………signage……………………
signage is so SUPER important! it’s how buyers know who you are and which booth they’re in and which products they’re looking at. you can help too by making sure all your work is grouped / displayed / organized in a way that makes sense and is clearly labeled (with product name and/or item number if applicable). so it’s as easy as possible for buyers to order your awesome stuff!

above: my walls with signage and booth number printed on the walls (lighting actually was much brighter than this pic shows!)
my signage was part of my printed walls, which made things really easy with nothing extra to worry about there. (except sticking my designs all nice and straight on the walls!) a super important part of signage is to make sure you include your booth number and make sure it’s very visible! it’s like your “address” for the show and how buyers find you. so make it crystal clear!
there are of course tons of ways to go about creating signage for your booth but sooo much depends on your branding regarding materials used and what it looks like. dimensional signs made of acrylic, metal, wood etc are great options and look super professional. as do decals, which can be adhered right onto the walls (foam or hard walls) and are fairly economical. printed/mounted foam board signs or words stenciled onto your (hard) walls work well too. if using curtains, you’ll most likely need to create separate signage that you’ll hang from the poles in front of your curtains.
……………………RECAP……………………
well, that about does it for the booth details! let’s recap…

WALLS
- curtains
they come with your booth but bring your own to coordinate with your brand. cost: $200-250. (based on ikea curtains) - foam walls
– DIY with foam board from an art store or flame retardant boards from set shop ($300-400). does not include labor or shipping. if buying regular, non flame retardant foam board make sure to buy flame retardant spray and keep the empty bottles and certificate as proof in case anybody asks during setup!
– installed foam board walls white ($1000) or in pantone color ($1800). these are early bird rates!! price goes up after a certain date!
– printed foam walls $1400 + freight from mega print. they’re in new hampshire so not TOO far from the show. though i got hit with extra freight charge for delivery to a “tradeshow zone”. something to keep in mind!
– union labor cost for setup $200-300 (based on 1 person for 1 hour on weekday or weekend day at the higher end) - hard walls
– DIY painted plywood walls starting at $200-300 (cost of plywood) + hardware + freight
– use an exhibit company…(price varies) peace of mind and convenience but lots more than DIY
FURNITURE
- use your own pieces (FREE!) + freight
- buy new ones! sky’s the limit, but use ikea or target for inexpensive pieces you can reuse or discard if shipping back isn’t worth it
- rent it! either from an exhibit company or local NYC prop houses or event companies.
– in my booth i rented. ghost chairs + table ($350 total, including delivery and pickup. table was too much in my opinion but was convenient!)
-rent from manny stone, props for today or ruth fischl to name a few.
LIGHTING
- BUY/DIY get ’em yourself and save! you can install lighting in your own booth if you have a booth under 100sqft and 6 or fewer lights. BUT check the manual because this seems to be unclear from year to year!
– clipon lights: $60 for six.
– buy from home depot, target, lowes, ikea etc. - RENT clip on lights: from an exhibit company: $99 each, installed. (this is the early bird rate. price goes up from there!)
- RENT from javits: parcan spotlight, approx $300 (pre-show pricing)
FIXTURES
- DIY: buy picture ledges, shelves, bookcases and cabinets from stores like ikea or target. cost varies. toss after or ship back to reuse each year.
- RENT from exhibit company or prop houses listed above. (my custom cabinet: $600 + tax)
FLOORING
- carpet
– DIY: buy interlocking carpet tiles ($350) at coco mats and more. or FLOR which is super popular too. both reusable!
– RENT from an exhibit company…similar pricing to above, but pay each year.
SIGNAGE
- PRINT ON WALLS included in printed foam price above
- DIY jut the cost of materials if you have access to a large format printer or a way to create decals!
- OUTSOURCE there are lots of places for dimensional signs, decals, etc…. even etsy!
well, that does it for the booth details! hope you find this helpful and will use this as a starting point for your own booth prep research.
want more? for tons more candid info and real show experiences, be sure to sign up for tradeshow bootcamp! you’ve probably seen me rave about it before….that’s because it’s a must going into your first show! (or your second or third or….) i’m a HUGE fan and highly recommend it. :)
happy planning!
xo
01/16/2013
bachelor pad wedding :: holly durst + blake julian
happy wednesday! i’m sooo behind on posting custom orders so thought i’d finally get back to it!
first up, the wedding suite from holly durst and blake jullian’s wedding! this was my second bachelor wedding and i SOMEHOW have not gotten around to posting it! oops! hopefully worth the wait though?
here are the awesome pics by callaway gable!! tons of not as awesome iphone behind the scenes snaps below the good ones! :)


i had such a great time coming up with the design for these and working with holly and her wedding planner lindsay from toast events on these pretties. two super fun girls for sure!
the look was a very simple, classic design yet it packed a lot of punch with tons of little-yet-over-the-top details — if you know about printing and stationery, you’ll understand what all went into this one, despite it’s super simple look…
we of course started with the save the dates, for which holly loved the idea of a photo book with black and white photography! so we went with that for the color scheme and added small touches of soft pink and gold for some added sparkle!
the save the dates were a custom french fold photobook with a peek of super soft pink between the pages, with a custom, hand-folded spine (to hide the holes) that the black organdy ribbon was woven thru. the inside front cover held all the save the date details, while the back inside cover had travel info, all printed in gold metallic ink on shimmery linen stock. the inside photo pages were printed on soft lettra cotton stock and were mailed in a matching envelope with gold metallic liner. i just LOVED the mix of all the textures!
all the images below are just quick snaps of the behind the scenes action…real shots (aka awesome photography by callaway gable) of the finished designs are above!
the first set of pictures are of the save the dates, then the invites and some of the day-of accessories follow.


next up, the invitations…these were really fab :)
as the wedding planning got into full swing, the look evolved into a very soft, super-elegant, yet simple almost white on white look but still with a touch of gold for the glam factor of course! the look was modern, glam, yet classic with a touch of traditional.
holly loved the idea of a diecut shape for the main invite and i had a perfect, classic yet modern shape in mind — a gatefold that folded into a curvy frame shape. holly also loved the idea of a pattern, but it needed to be subtle. so i created one that mimicked the shape of the invitation frame and we blind letterpressed that onto the sides of the gate, and on the front and back.
when opened all the invitation details were revealed, letterpressed in gold metallic ink on cotton 2-ply board to allow for the blind impression on both sides…which also made for the perfect thickness for the shiny gold edge-painting (swoooon) that was the finishing touch on this piece. the insert cards were flat printed in gold on cotton stock and the whole suite was double wrapped with white, gold-trimmed organdy ribbon and slid into a white envelope lined with gold metallic paper. TONS of texture again! love!
again, just iphone snaps of the assembly below. real pics all the way down :)


then came the day-of accessories…
these fell right in line with the look of the invites and included lucite (!) escort cards and table numbers, cut into the frame shape of the invitation and etched with table numbers and guest names (talk about glam!), programs that mimicked the look of the save the dates but with a simpler binding technique and the white-with-gold-trim ribbon, and welcome notes and menus for each guest, all flat printed in gold on cotton stock.
below are some assembly snaps of the programs.


